360° tours - from recording to completion
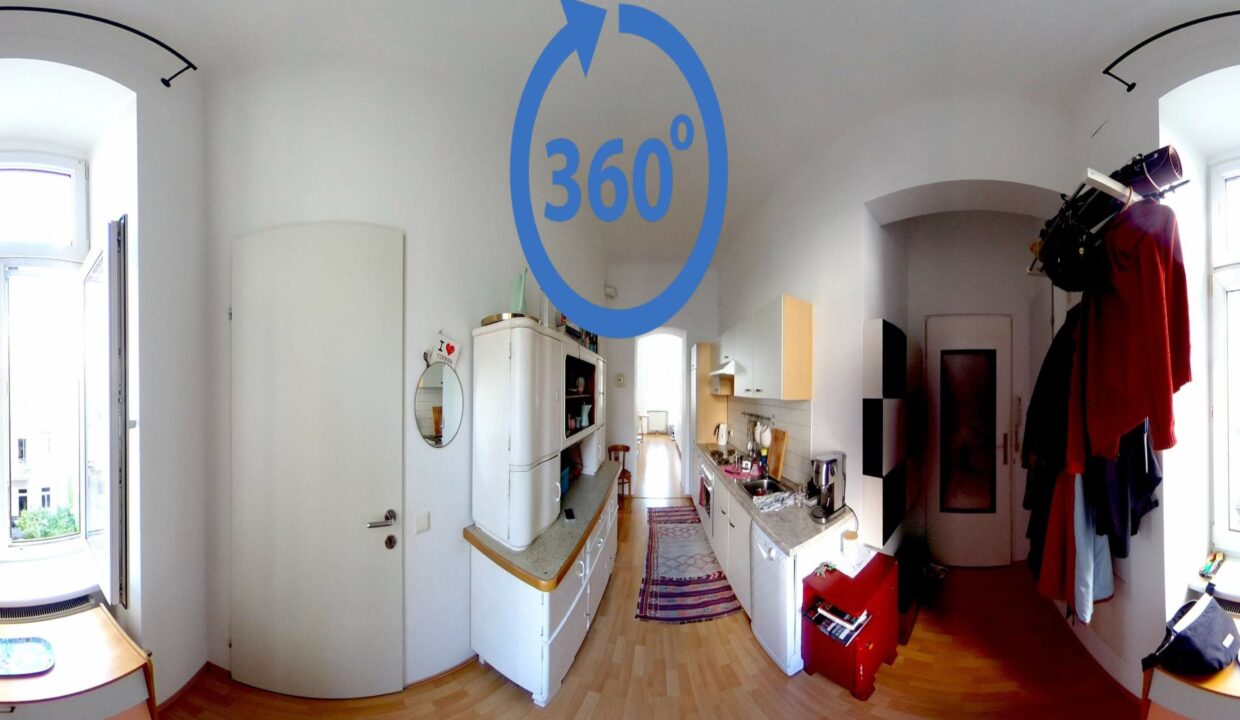
For the It seems simple to customers. However, 360° tours are often anything but simple and time-consuming from creation to completion. This time I would like to give you an insight into how the creation of a 360° tour works.
We are working with a system from Germany. The equipment, i.e. tripod and camera, was also sold. This equipment is conveniently packed in a shoulder bag. Nevertheless, I often arrive at initial meetings with my handbag, folder with the sales documents, moisture analyser, measuring tape, large digital camera and 360° equipment. My sales sign with cable ties to hang it up is usually still in the boot.
During a 360° tour, the customer sees every detail of a property. Beforehand, I advise the customer to clear away all personal belongings, take photos with private shots and, above all, tidy up the flat/house.
There are 2 groups of customers here: For some, everything is so perfectly tidy that it looks as if the property has only just been occupied. On the other hand, there are customers who need to be rearranged before the photos are taken - from one room to another so that the photos look good. Nevertheless, it is unavoidable that photos have to be reworked. It is important to bear in mind that backlighting from the sun in a room or rain can have a strong influence on the lighting conditions in the property. Neighbouring houses or other people's cars, and often private photos too, have to be pixelated so that they are not visible on the Internet.
I have an app on my mobile phone that is connected to the 360° camera via Wi-Fi. As soon as this contact is established, you can start taking photos. The tripod is set up in various positions in the room and the photo is taken via the mobile phone. To do this, it is necessary to go into another room so that you are not visible in the photo. This is often a challenge in the garden - the wind blows, the tripod wobbles and cannot be fixed. Here, too, there have been occasional mishaps.
The tedious work then begins in the office: editing photos, cleaning up plans so that only the rooms without dimensions and drawings are visible on the plan. Otherwise, the points set for the tour are no longer visible and appear confusing. The individual photos are also labelled so that they can be positioned correctly. To do this, I mark all the points on a plan where I have placed the tripod so that I can label the photos correctly later. I have to bear in mind that a 360° shot is not as clearly recognisable as a fixed image.
In the programme itself, all photos are labelled, points are set as to how the customer should see the photo first, i.e. at which point the tour of a room begins. The spots are placed on the plan and the correct photos are assigned to them. This allows the customer to go through the tour by clicking on our logo and thus moving from room to room. Or the customer can click on the spots on the floor plan and view the rooms that interest them first.
I can generally release the tour for customers or only manually on request. Or the customer can activate it themselves by entering their name, telephone number and e-mail address.
What looks very simple is, like many things, very time-consuming.
However, the 360° tours have reduced the number of viewings because we only visit when customers have viewed the tour. As this is very informative, both sides save a lot of time. Customers can find out whether the property is interesting without having to view it on site.
This means that our area of responsibility has shifted towards much more preparation, visual presentation, etc., so that an on-site visit is only the finishing touch.


